This type of robot allows you to configure the auto-population of some fields if the user has changed other fields on the task form.
For example, the task form has the fields “Cost”, “Quantity” and “Total price”.

You can set up an auto-calculation robot that automatically recalculates the data in the Total Price field using the “Cost x Quantity” formula if the user changes the values in the “Cost” or “Quantity fields”.
Setting up the robot
To set up the auto-calculation robot, you need to do the following:
1. Open your business process
2. Go to the Robots tab
3. Click on the Add Robot button
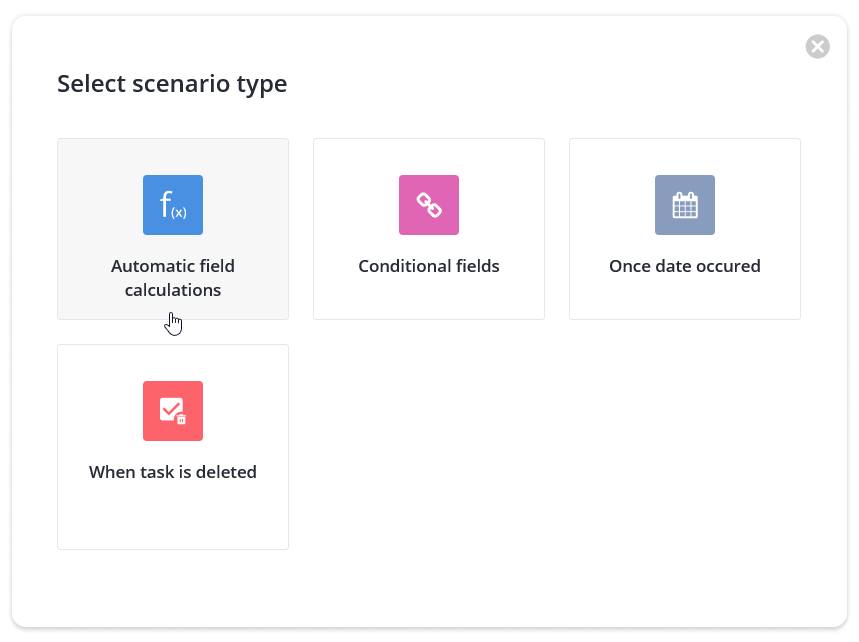
4. Select the type of robot Automatic field calculations
5. In the tab that opens, you will need to set the name of the robot and configure the conditions in three sections
| If an event happened | Trigger conditions are added in this block. You need to mark those fields, changing which will automatically fill in the fields specified in the Then block. |
| Also the following additional conditions are met | Block Also in an additional block of conditions. Here you can set a condition for those fields that have not been modified by the user, but logically affect whether the robot needs to make an update. |
| Then follow these steps | In the Then block, the directly performed action is configured. That is, which fields and with which values should be updated. |
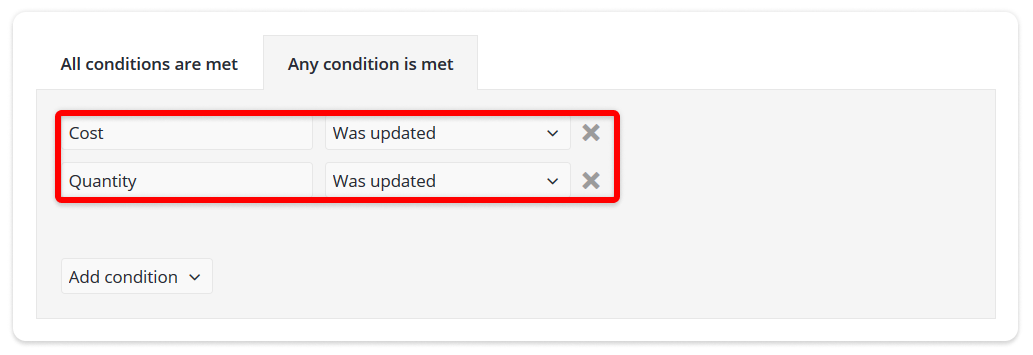
6. Configure the block If
In this section, you need to mark the fields, that when modified, will trigger the auto-population. For each such field, you need to add a Condition
To set up a condition, select the Field in which the value is to be changed and an Operator that defines how the field has changed.
For example, the robot can be executed only if the new entered value in the “Cost” field has become more than 1000. For this, the condition will be configured as: “Cost” -> “Has become greater” -> “1000”

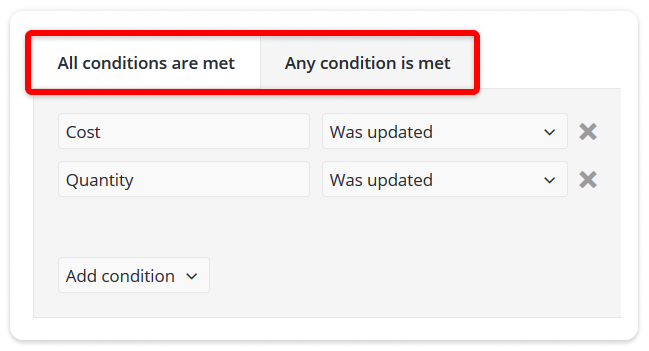
You can set several conditions at the same time and indicate: it is necessary that all conditions were met simultaneously, or it is enough to fulfill any of the specified conditions. To do this, switch between the tabs All conditions are met and Any condition is met.
7. Specify additional conditions in block A and In this block you can set conditions for those fields that have not been modified by the user, but the data in them affects whether the robot needs to update.
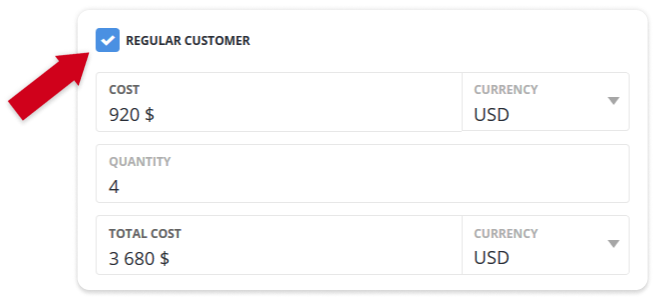
For example, on the form there are fields “Cost”, “Quantity”, “Total cost”, and a checkbox “Regular customer”.
In the If conditions, you configure that when you change any of the “Cost” or “Quantity” fields, the “Total cost” field should be calculated using the formula.
In this case, in block A you can also specify an additional condition for the robot to update the “Total cost” field only if the “Regular customer” checkbox is enabled. To do this, in the section you need to add the condition “Regular customer” -> “Yes”

You may need to set such additional conditions if you add 2 robots at once to fill in the “Total cost” field. Depending on the type of customer we are processing, robots will calculate the total cost in different ways.
8. In the Then block, configure which fields will be updated by the Robot
You can instruct the robot to substitute a specific value, for example, “Total cost” -> “Fill with text” -> “2000”.
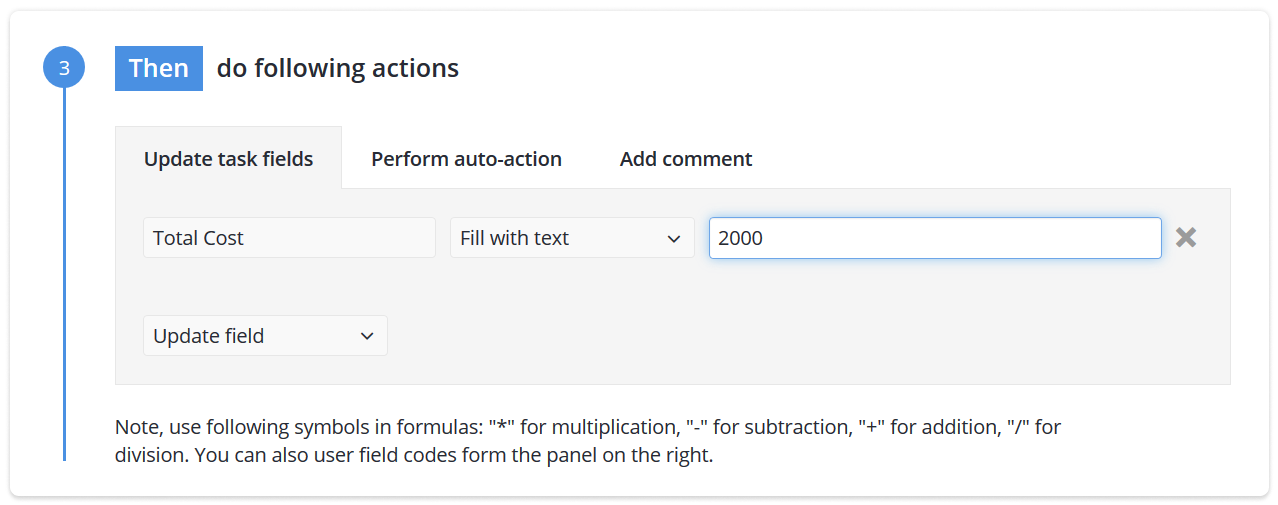
Then, when the robot is executed, the value 2000 will be automatically entered in the field. The previously entered value, if any, will be overwritten.
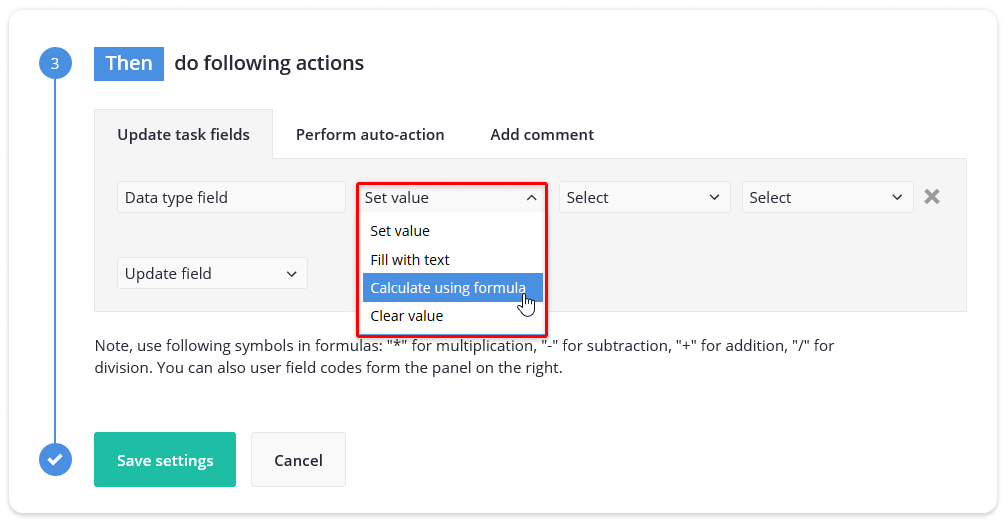
For fields of type Money and Number, you can also use the Calculate using formula operator. With its help, it will be possible to fill in the field not with a static value, but take it from other fields of the task, recalculate.
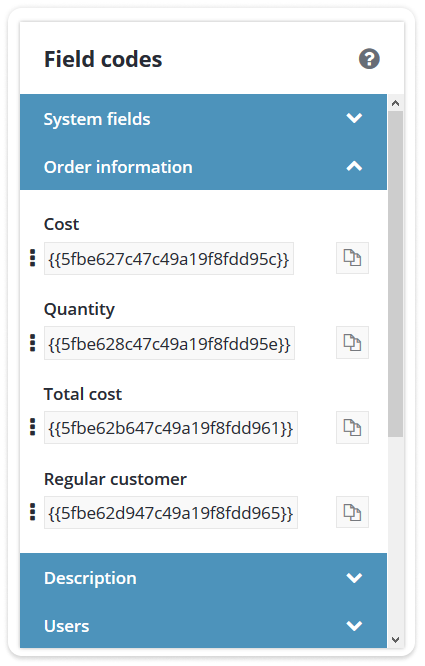
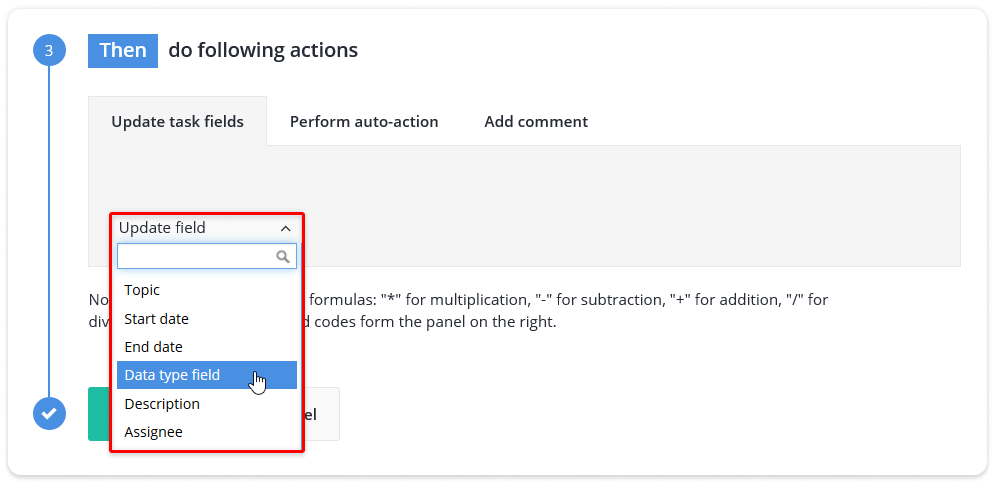
To do this, in the Update field list, select a field with the Money or Number type, set the Calculate using formula operator and insert field codes from the panel on the right into the field with the formula.
The following symbols must be used between codes for simple arithmetic operations.
- “-” for subtraction
- “+” For addition
- “*” For multiplication
- “/” For division
For the given example, the formula for the “Total Cost” field will look like this:
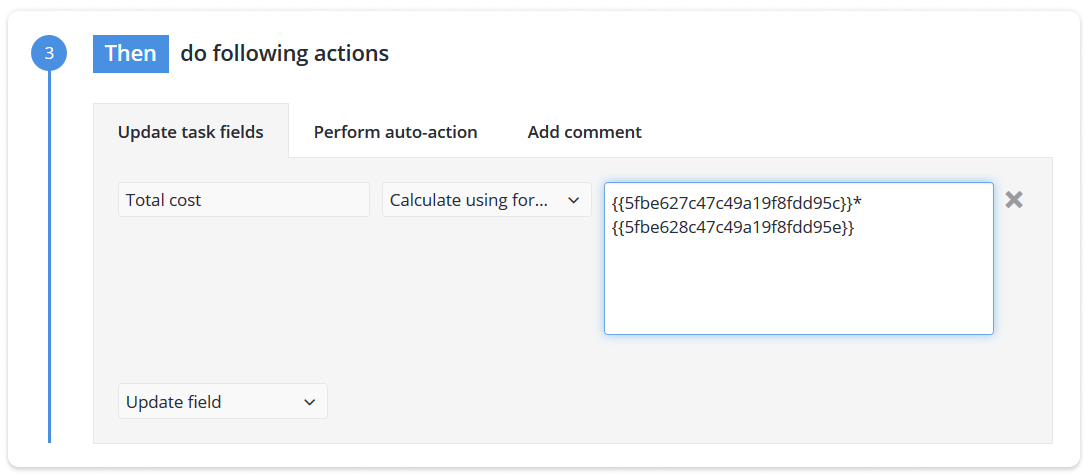
In the formula, you can also use individual numbers, brackets. For example, if the amount is to be calculated using VAT 21%, then the formula will look like this:
{{field_code_value}} * {{field_code_number}} * 1.21
9 . When you populate all the blocks with conditions, then save the Robot settings and the business process itself.
Ability to add time to date using a robot
When working with dates, sometimes you need to fill in the date in a field using the following logic: “today + 10 days” or “Date of registration of the contract + 3 days”.
To do this, you can use the field codes in the Formulas/dates tab of the time.
For this:
1. In the robot settings, select the field with the Date or Date and time type
2. Select the Calculate using formula operator
3. From the menu on the right, open the Date / Time Formulas tab. Copy the required code, paste it into the field
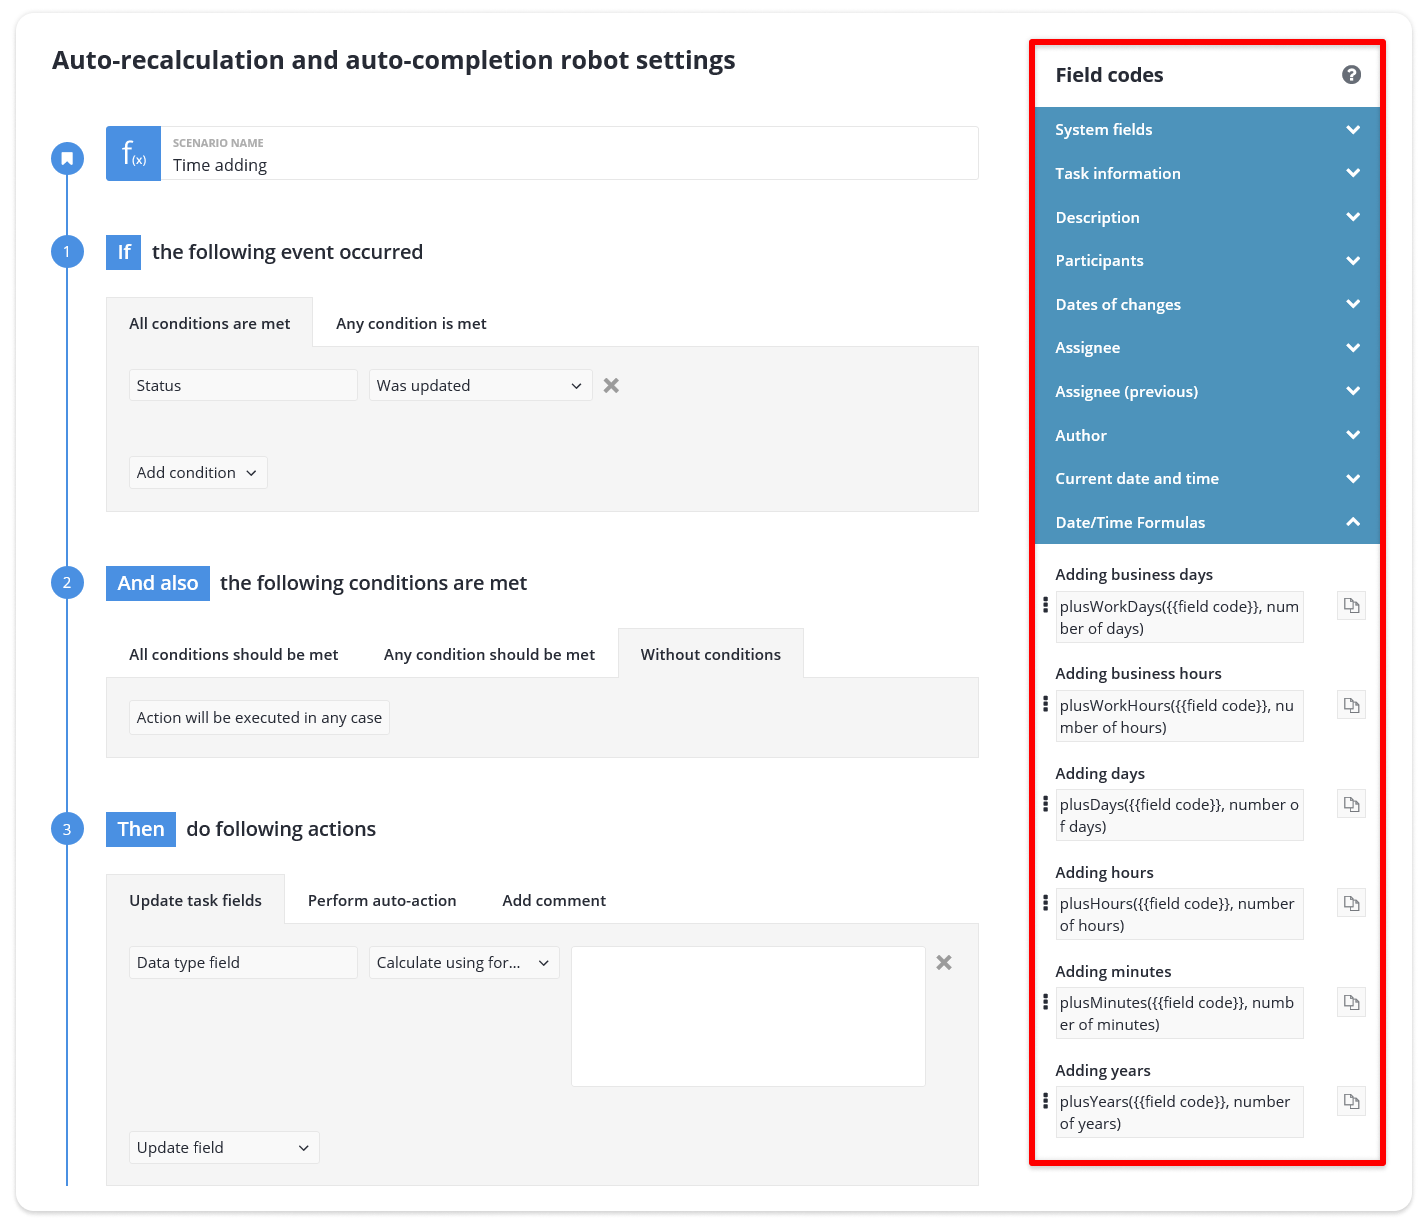
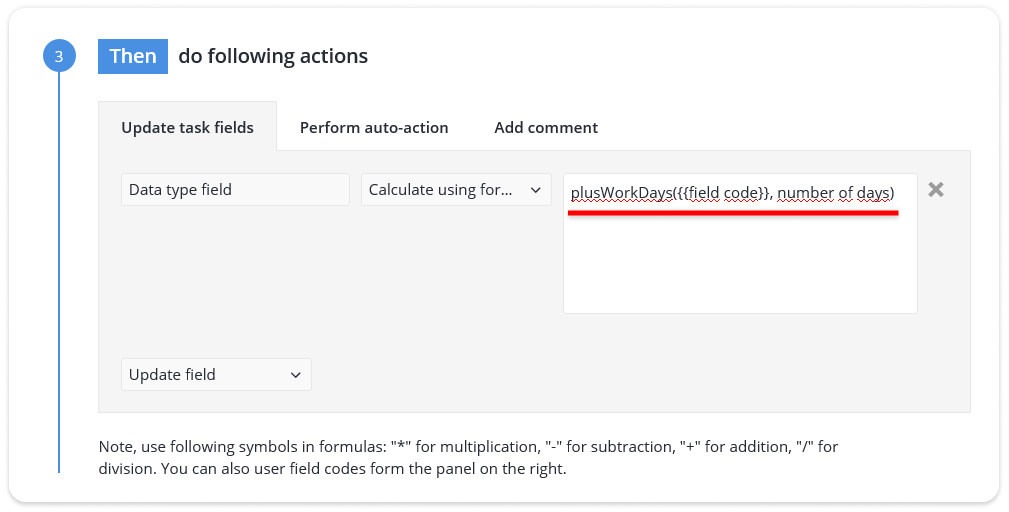
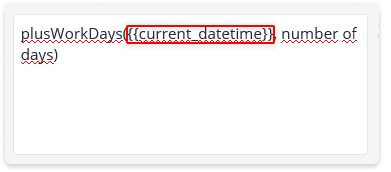
4. You need to replace the ({{field code}} with the code of any Time type field. For example, Current date and time. To do this, open the tab with Current date and time codes and select Date and time. Insert the code in the result

5. Instead of the Number of years / days / hours / minutes, specify the time interval that you want to add
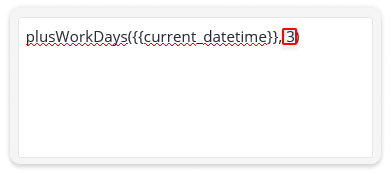
Let’s say you add days. If you enter the value 3, the formula will add +3 days. The general formula will look like this:
plusWorkDays ({{current_datetime}}, 3).
6. We save the robot.
Done! When the conditions of If are met the robot enters the required value in the “Date of next maintenance” field.